利用maven来构建node项目,从未避免污染全局的node环境
1. 准备
2. 安装并配置maven
先安装好JDK,并配置环境变量 。见之前的文章 JDK安装和配置环境变量
解压maven-3.9.1-bin.tar.gz到指定目录,例如:
1
| D:\Program Files\Java\apache-maven-3.9.1
|
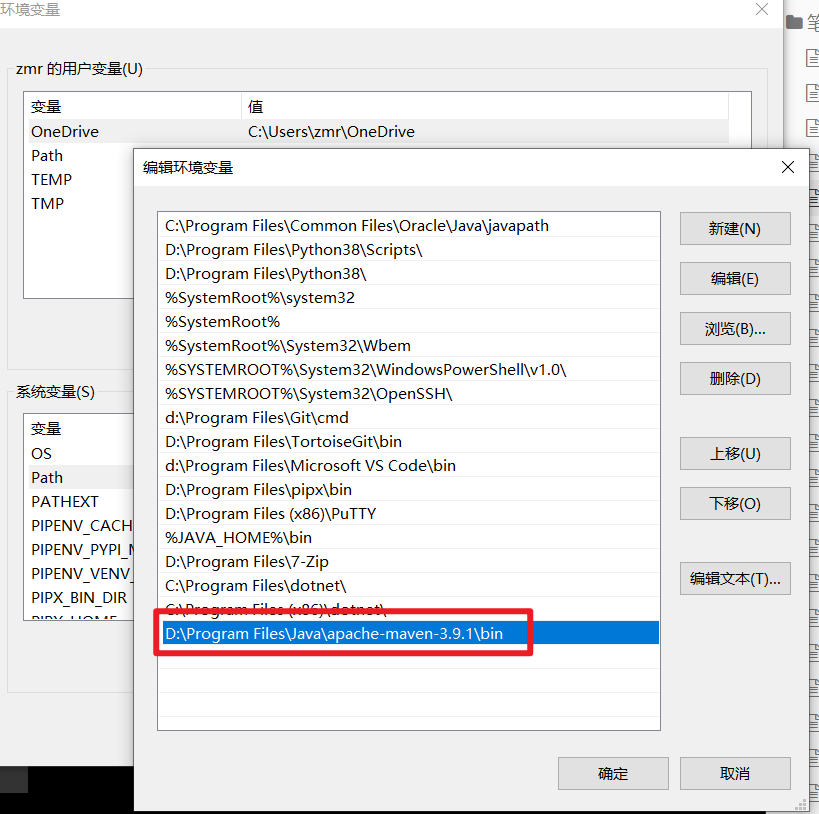
将bin目录添加到环境变量

修改maven本地仓库目录,maven从远程仓库中下载构件默认是存在当前的用户目录中的,因此最好修改一下地址
1
2
3
4
5
6
| 修改D:\Program Files\Java\apache-maven-3.9.1\conf\settings.xml
这个默认是注释掉的,把它修改并添加进来
<localRepository>/path/to/local/repo</localRepository>
改成你自己的:
<localRepository>E:/maven/repo</localRepository>
|
修改maven源为阿里源(可选,全局的)
1
2
3
4
5
6
7
8
| D:\Program Files\Java\apache-maven-3.9.1\conf\settings.xml
<mirror>
<id>aliyunmaven</id>
<mirrorOf>*</mirrorOf>
<name>阿里云公共仓库</name>
<url>https://maven.aliyun.com/repository/public</url>
</mirror>
|
再将修改好的settings.xml文件复制一份到新建仓库(E:\maven\repo)目录下
3.通过maven来构建node
- 在node项目下面新建
pom.xml文件,并且和package.json放在一起
pom.xml内容:
1
2
3
4
5
6
7
8
9
10
11
12
13
14
15
16
17
18
19
20
21
22
23
24
25
26
27
28
29
30
31
32
33
34
35
36
37
38
39
40
41
42
43
44
45
46
47
48
49
50
51
52
53
54
55
56
57
58
59
60
61
62
63
64
65
66
67
68
69
70
71
| <project xmlns = "http://maven.apache.org/POM/4.0.0"
xmlns:xsi = "http://www.w3.org/2001/XMLSchema-instance"
xsi:schemaLocation = "http://maven.apache.org/POM/4.0.0
http://maven.apache.org/xsd/maven-4.0.0.xsd">
<!-- 模型版本 -->
<modelVersion>4.0.0</modelVersion>
<groupId>com.zmr.test</groupId>
<!-- 项目的唯一ID,一个groupId下面可能多个项目,就是靠artifactId来区分的 -->
<artifactId>test-war</artifactId>
<!-- 版本号 -->
<version>1.0</version>
<!-- <packagin>war</packagin> -->
<name>test-war</name>
<repositories>
<repository>
<id>alimaven</id>
<url>https://maven.aliyun.com/repository/public</url>
</repository>
</repositories>
<pluginRepositories>
<pluginRepository>
<id>alimaven</id>
<url>https://maven.aliyun.com/repository/public</url>
</pluginRepository>
</pluginRepositories>
<properties>
<project.build.sourceEncoding>UTF-8</project.build.sourceEncoding>
<node.version>v12.18.0</node.version>
<frontend-maven-plugin.version>1.10.0</frontend-maven-plugin.version>
<project.reporting.outputEncoding>UTF-8</project.reporting.outputEncoding>
<maven.compiler.encoding>UTF-8</maven.compiler.encoding>
</properties>
<build>
<finalName>test</finalName>
<plugins>
<plugin>
<groupId>com.github.eirslett</groupId>
<artifactId>frontend-maven-plugin</artifactId>
<version>${frontend-maven-plugin.version}</version>
<executions>
<execution>
<id>install node and npm</id>
<goals>
<goal>install-node-and-npm</goal>
</goals>
<configuration>
<nodeVersion>${node.version}</nodeVersion>
<!-- <npmVersion>6.4.1</npmVersion> -->
<downloadRoot>http://npm.taobao.org/mirrors/node/</downloadRoot>
</configuration>
</execution>
<execution>
<id>npm install</id>
<goals>
<goal>npm</goal>
</goals>
<configuration>
<arguments>install --registry=https://registry.npm.taobao.org </arguments>
</configuration>
</execution>
</executions>
</plugin>
</plugins>
</build>
</project>
|
- 使用:
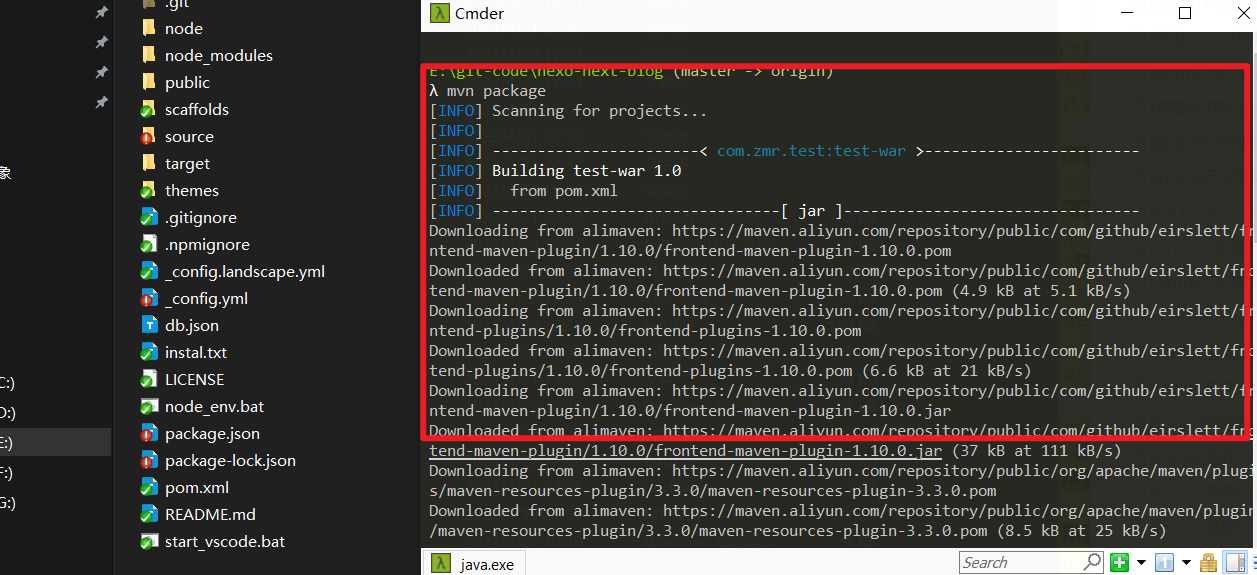
在pom.xml所在的目录打开cmd窗口,执行mvn package

会在当前目录下生成node和node_modules两个目录,里面包含了当前node项目所需要的运行环境。
4. 使用技巧
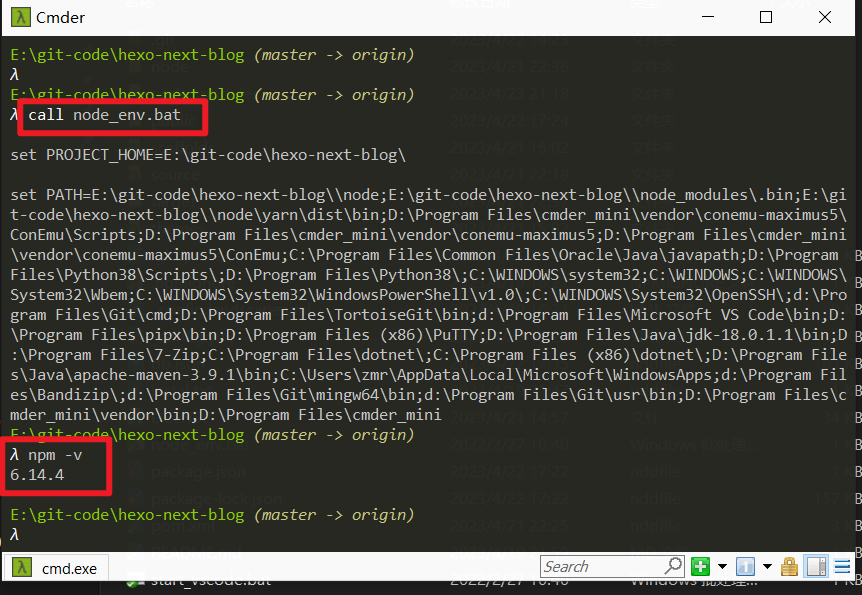
如果需要运行npm相关的命令,可添加node_env.bat,然后加载到当前的cmd窗口中即可
1
2
3
4
5
6
7
| node_env.bat
写入下面的内容并保存,其实就是添加了一个临时的环境变量
set PROJECT_HOME=%~dp0
set PATH=%PROJECT_HOME%\node;%PROJECT_HOME%\node_modules\.bin;%PROJECT_HOME%\node\yarn\dist\bin;%PATH%
|


